How to Change Colors & Fonts in Squarespace
Your website’s colors and fonts play a huge role in your brand identity. Fortunately, Squarespace makes it easy to customize them to match your style. In this guide, I’ll walk you through how to update your site’s colors and fonts in just a few clicks.
Step 1: Access the Design Panel
To start customizing your site’s look:
Log into your Squarespace account and open your website.
In the left-hand menu, click “Design” → “Site Styles”
Step 2: Editing Your Fonts
Once inside the Site Styles panel:
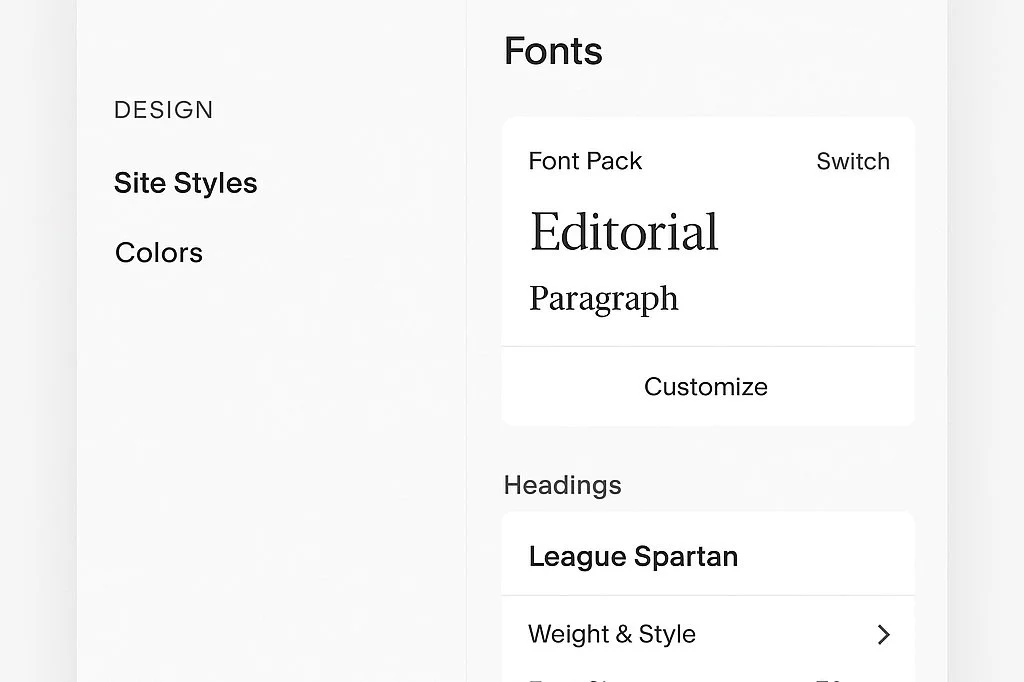
Click “Fonts” to see Squarespace’s font options.
Choose a preset font pack for quick styling, or click “Customize” to mix and match fonts.
Adjust font sizes, letter spacing, and line height to fine-tune your typography.
PRO TIP
Stick to two to three fonts max—one for headings, one for body text, and optionally a third for accents.
Step 3: Changing Your Color Palette
To update your colors:
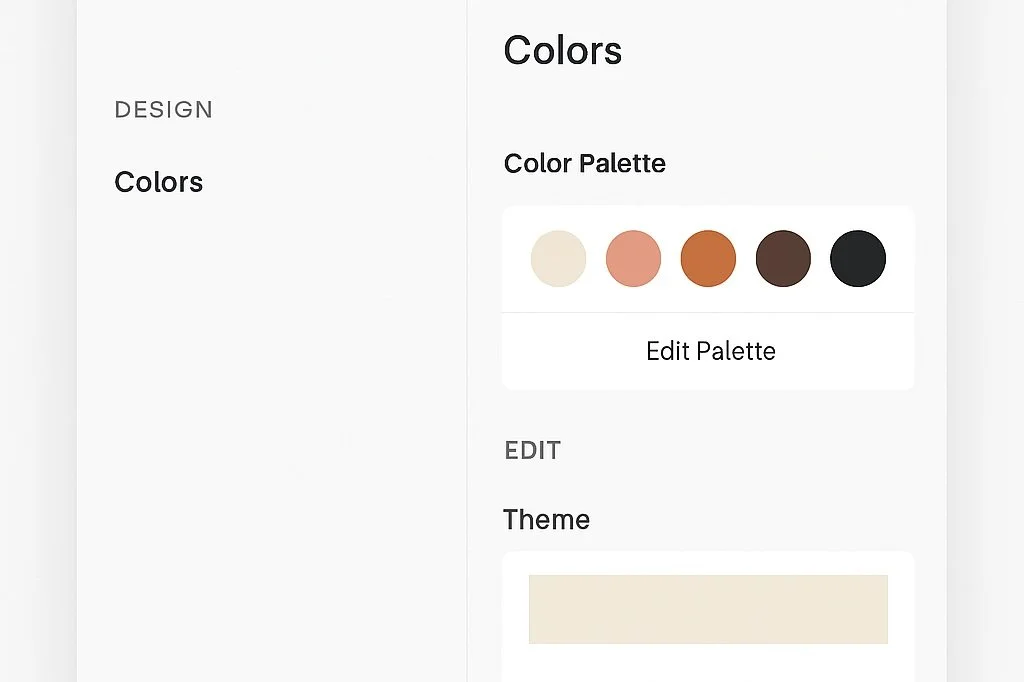
In the Site Styles panel, click “Colors”
Choose a pre-designed color palette, or create your own using the color picker.
Click on each section (backgrounds, text, buttons, etc.) to assign colors to different elements.
PRO TIP
Use high-contrast colors for buttons and links to improve readability and conversions!
Step 4: Save & Preview Your Changes
Once you’re happy with your updates:
Click “Save” in the upper-left corner.
Preview your site on both desktop and mobile to ensure everything looks great!
PG Creative Designs is a New York-based expert web design studio re-imagining bold brands and creating high-converting websites through visual storytelling.
Ready to chat about your project?
Have questions about Squarespace? Leave a comment below!


